

This article was written by The Zillennial Zine’s fall editorial intern Brianna Allison. Find her on Instagram at @ballison7. If you would like to share an article with The Zillennial, send us an email at thezillennialzine@gmail.com.
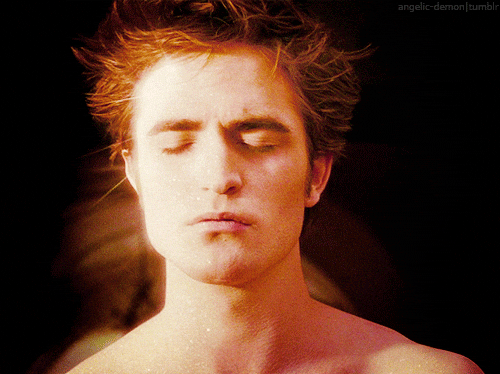
We’ve all suffered through having a bad driver’s license or passport picture. No matter what we wear or how long we take to get ready, it doesn’t seem to matter. But thankfully, TikTok has come to the rescue. Georgia Barratt, a TikTok star, recently went viral for showcasing the makeup routine she followed to achieve the perfect passport photo. Her tips can even apply to driver license makeup.
Since government IDs last for years, it’s crucial to know what to do before you head to the DMV. Make sure to check out the tips below so you don’t have to dread handing over your ID when you get carded.
Start with prime and glow
Before any makeup is on your face, it’s important to prime your skin to give it some glow. Since the pictures that are taken for licenses and passports are very flat, your skin will look dull and colorless if you go with more of a matte look.
To give your skin a healthy radiance, you can use a glowy primer, an illuminating filter before your foundation or even both! Here are some priming options that will glisten your skin while also keeping your makeup in place all day:
Now, don’t be afraid to add some more glow! For all of the following options, you have the choice to wear them alone or add foundation on top. They all provide you a subtle sparkle, not anything too flashy or over the top:
Don’t worry about looking too shiny after all of the glow! Because after you have applied all of your liquid products, you’ll want to set with powder. Use a powder bronzer where you applied your contour, set your concealer with a translucent powder and go in with a powder blush. Doing this will control your oil but not make your skin too matte!
Carve out your features
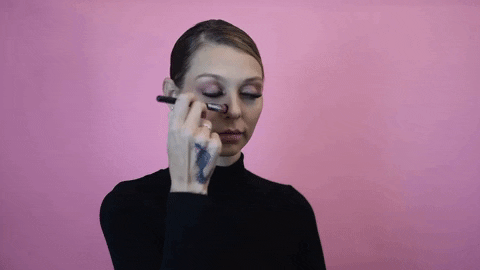
After you’ve put your foundation on, it’s time to make your face look snatched. Regardless of the order you do your makeup, it’s important to carve out your features! Using contour is essential because it gives depth to your face.
Personally, I start with my eyebrows. So first, fill in your brows, give them some structure and then carve them out with concealer. The concealer will help sculpt them and make them look more symmetrical to help with the proportions of your face.
Next, you can use contour to carve out your cheekbones, forehead, jawline and nose. If you aren’t sure about the best way to contour your face shape, check out this guide from IPSY. When you contour your cheekbones, add some concealer underneath to clean it up a little bit and make them look more sculpted. You don’t want a harsh and prominent line, but still want it to be clean.
To contour your face, you can use a putty, a contour stick or a wand. Here are some great options to try:
Give your face a lift
Now, that you carved out your features, It’s important to lift them. It’s easy to give yourself a facelift when you put your concealer in the right place. You’ll want to put some concealer in between your eyebrows, from the outside corner of your eyes to your temples, from the ends of your mouth up towards your ears, and down the bridge of your nose. When you’re putting your concealer on make sure you draw upwards so it gives the illusion of a lifted face.
Doing this can thin out your face and make your look more chiseled. Here are some great concealer options to brighten and highlight the right places:
To achieve an even more lifted face for your picture, add your blush high on your cheekbones. This will add some more color to the high points of your face and help to accentuate your features.
Soften your eyes with a lighter look
I noticed that when Georgia did her makeup for her passport picture, she didn’t do a whole lot with her eye makeup. Keeping it light on the eyes helps them to stand out in the right way. As someone who usually has a full eye look with shadow, a winged liner, and liner in my waterline, it’s hard for me to let go of this look. But I recently got my picture taken for my license and was feeling good about my look. Then I got my picture back and was very disappointed. And honestly, I think it was because my eye makeup was too dark.
Instead of going in with tons of eyeshadow or thick eyeliner, start with taking some of your bronzer onto your eyelids. Connecting the color on your cheeks with your eyes adds cohesiveness to your look. Then use a brown or black eyeliner or eyeshadow and create a thin line across your lash line to add definition. You can then decide if you want a wing or not.
But, one look that has been popular in license and passport pictures is siren eyes. To achieve this look you take your liner from the top of your lid to the inner corner and back down to the bottom lash line. The way the eyeliner is drawn out helps to elongate the eyes.
Try these tips, and you just might come out with the best driver’s license or passport picture that you’ve ever had! But, remember makeup is all about creativity, so do what is best for your face shape, what you like and what makes you feel good.
Comment below if you’ve tried any of these tips or plan to for your next driver’s license picture! What will your driver license makeup look be like?


Leave a Reply